Pluss HQ.
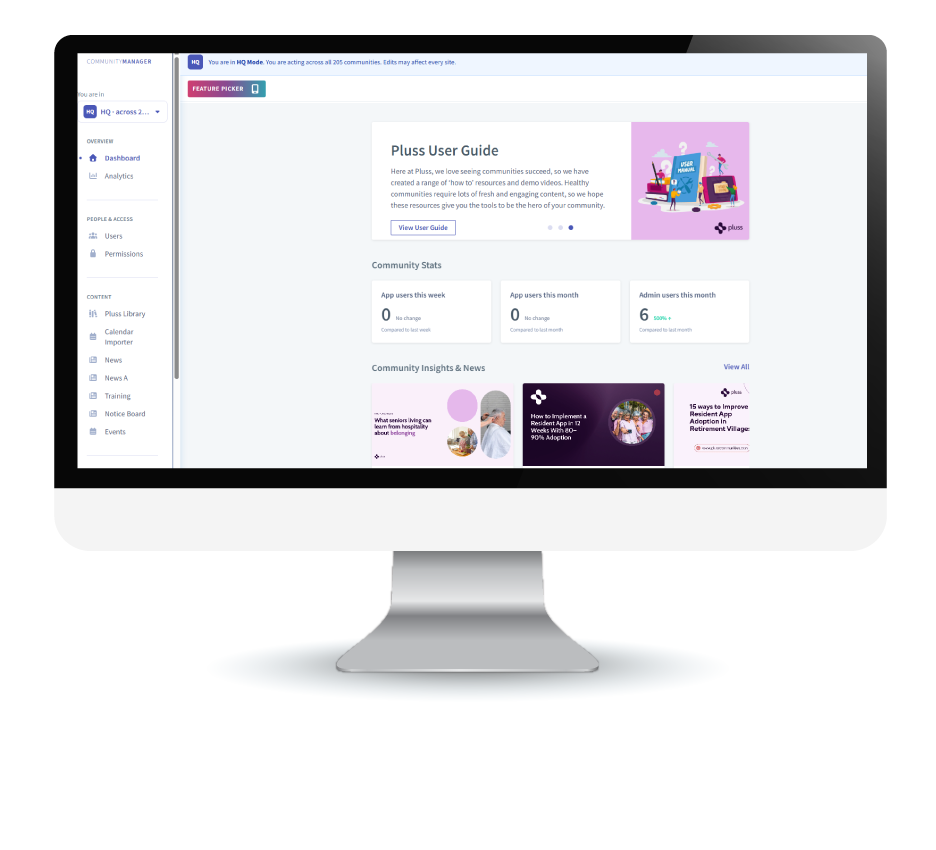
Pluss HQ is the central hub for managing multiple communities, allowing you to compare analytics, share content, publish news, and standardise settings across your network.
Explore Pluss HQ.
-

How to access Pluss HQ.
-
Exploring HQ analytics.
-

Managing HQ users and permissions.
-

Create a news story from HQ.
-

Creating a draft library of news stories and events.
-

Accessing the Pluss templates.
How to access Pluss HQ.
Pluss HQ is the central management hub for organisations operating across multiple villages. It streamlines administration by giving you a single place to manage shared content, compare site performance, and maintain consistent configurations across your network.
From Pluss HQ, you can compare analytics across sites, publish news to multiple communities at once, build shared libraries of news posts and event drafts, and access professionally curated Pluss news templates. You can also create site templates that standardise Feature Picker settings, app views, user types, forms, and maintenance forms, with updates automatically flowing through to linked sites.
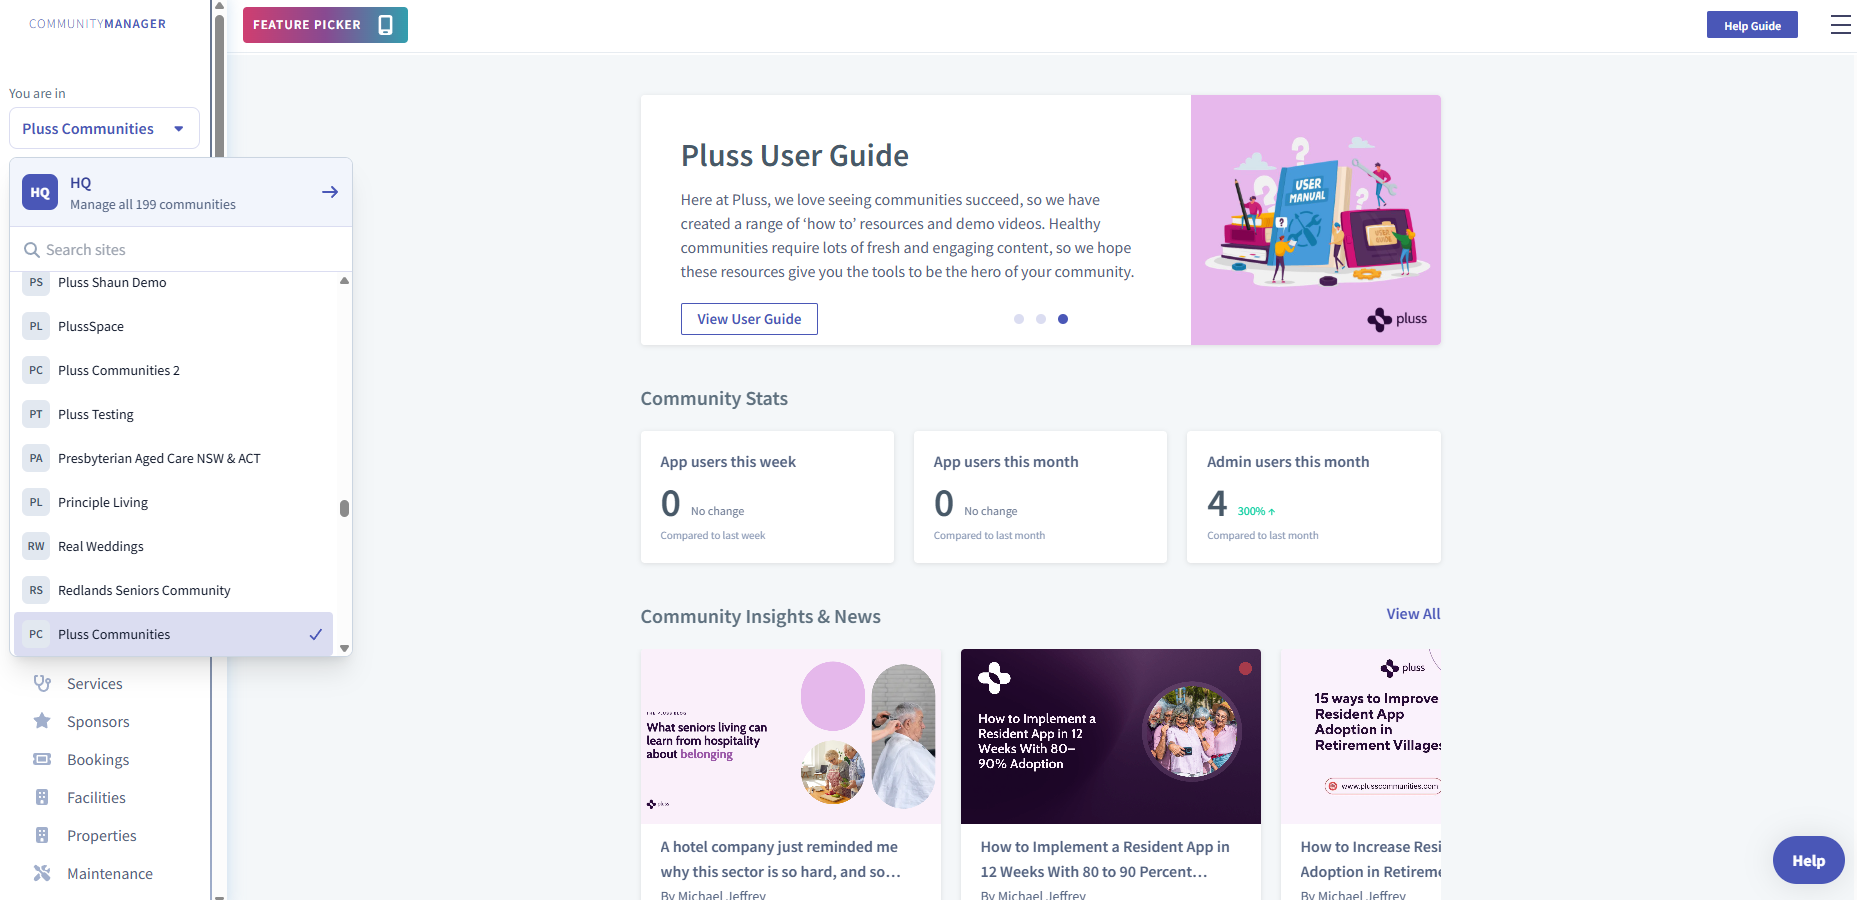
To access HQ, from the dashboard:
Select the site selector drop down list (top left corner)
Select HQ (manage all communities) found at the top
You are now in HQ mode.
Exploring HQ analytics.
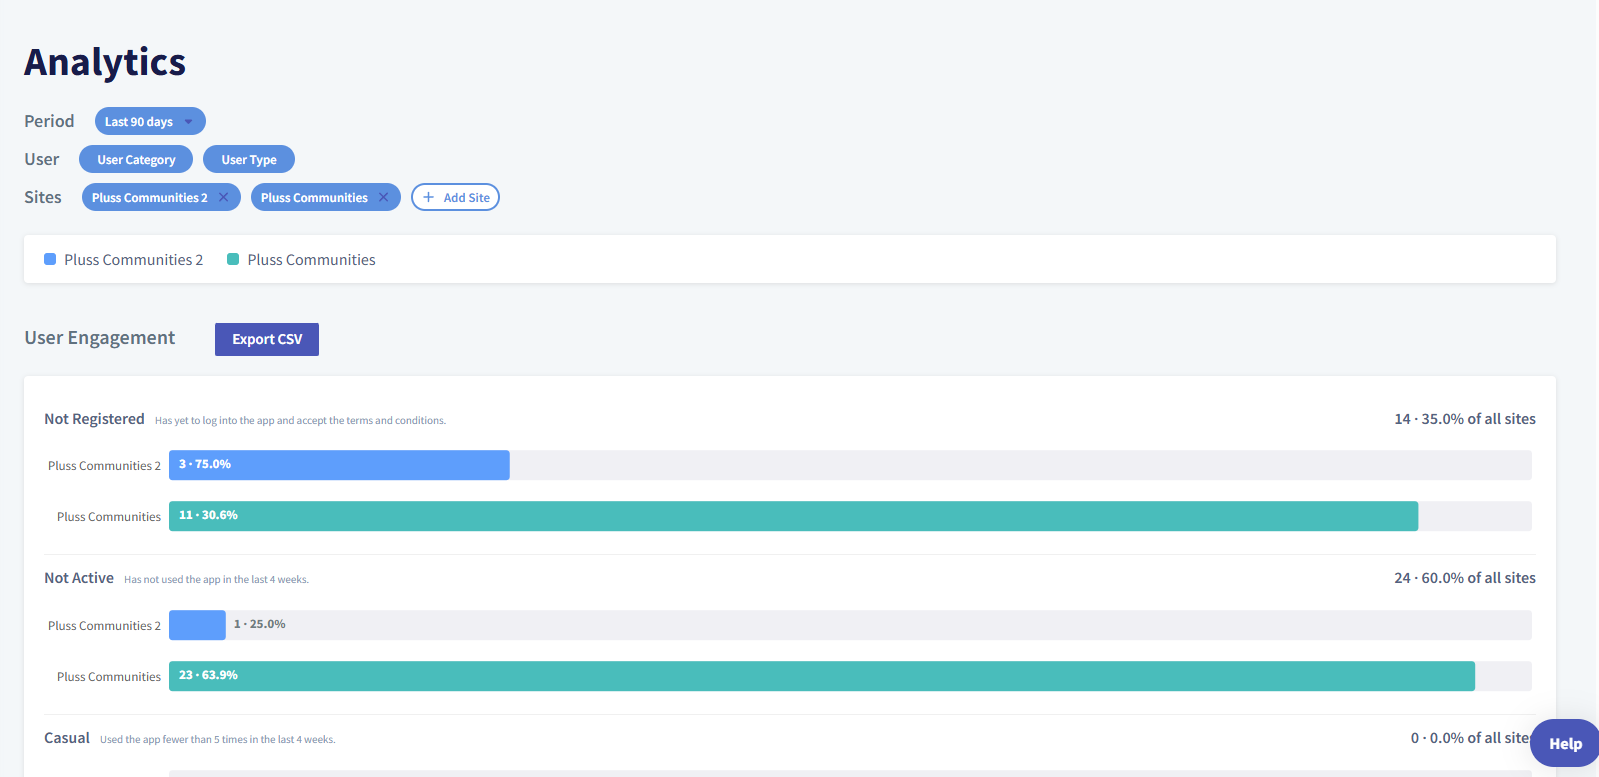
The Analytics section in Pluss HQ provides a centralised view of performance across all villages. Compare engagement, user activity, content performance, and key metrics from multiple sites in a single dashboard, making it easy to identify trends, benchmark communities, and gain valuable insights to support data-driven decisions across your organisation.
To access Analytics, from the HQ dashboard:
Select ‘Analytics’ (left side menu)
Now, begin by filtering your preferred options:
Period
User category / type
Sites
Once your filtering is in place, simply scroll down to review and compare the data.
Further details about Analytics can be found in the user guide.
Managing HQ users and permissions.
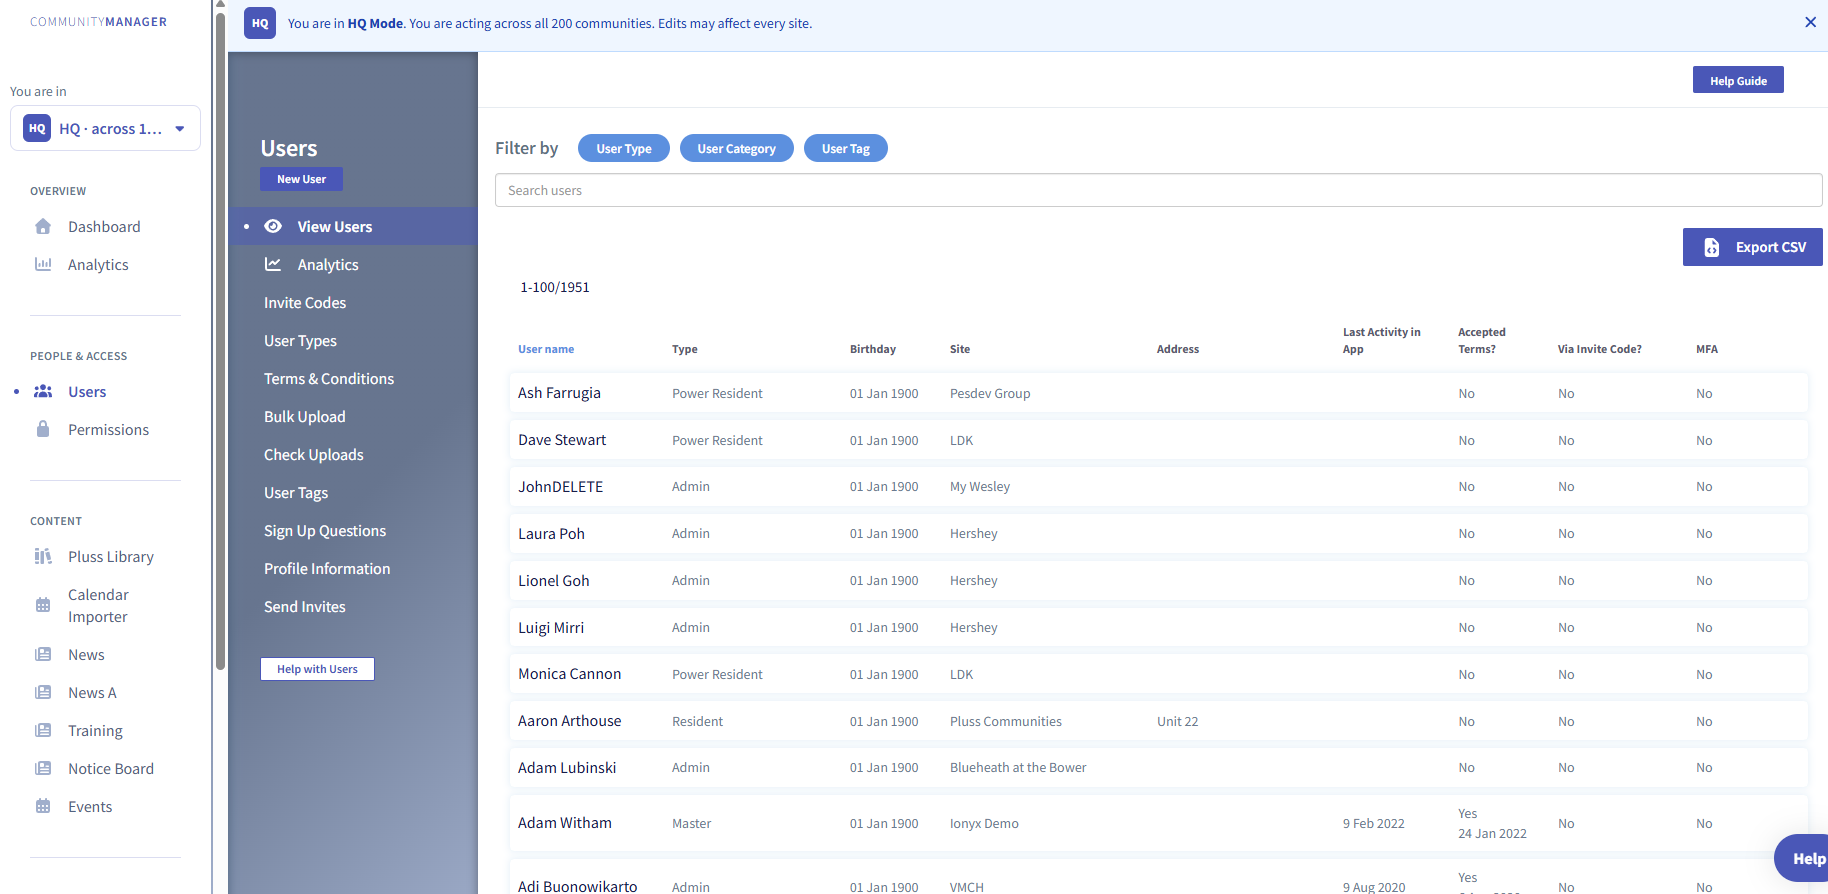
The Users section in Pluss HQ provides a centralised view of users across all communities. Search, view and manage user profiles from a single location, making it easy to access user information, monitor activity, and maintain consistent user management across your entire organisation without switching between individual community sites.
To access HQ Users:
Enter the Users dashboard by clicking ‘Users’ in the left side menu.
You are now viewing all users across all sites.
Further details about Managing your Users can be found in the user guide.
Managing permissions.
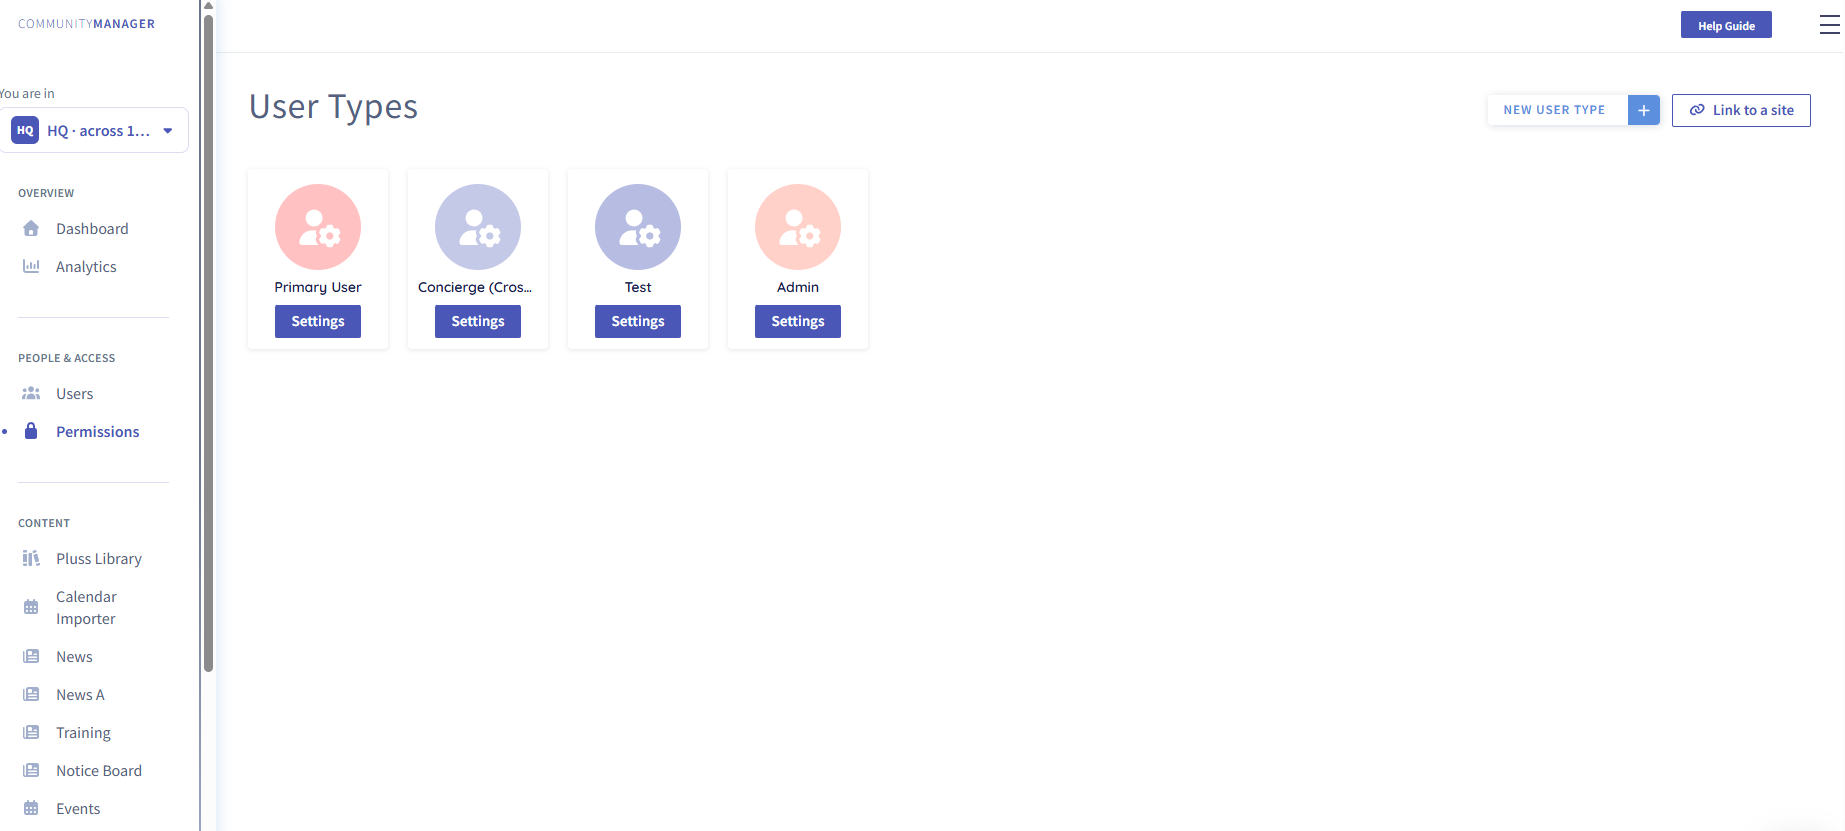
User type permissions can be managed across all sites in Pluss HQ.
To manage user permissions:
Enter the Permissions dashboard by clicking ‘Permissions’ in the left side menu.
You are now viewing the user type permissions across all sites.
Refer to the user guide for instructions on managing the user types.
Create a news story from HQ.
To create a news article, from the HQ dashboard:
Click the ‘News’ feature by clicking the link in the left side menu.
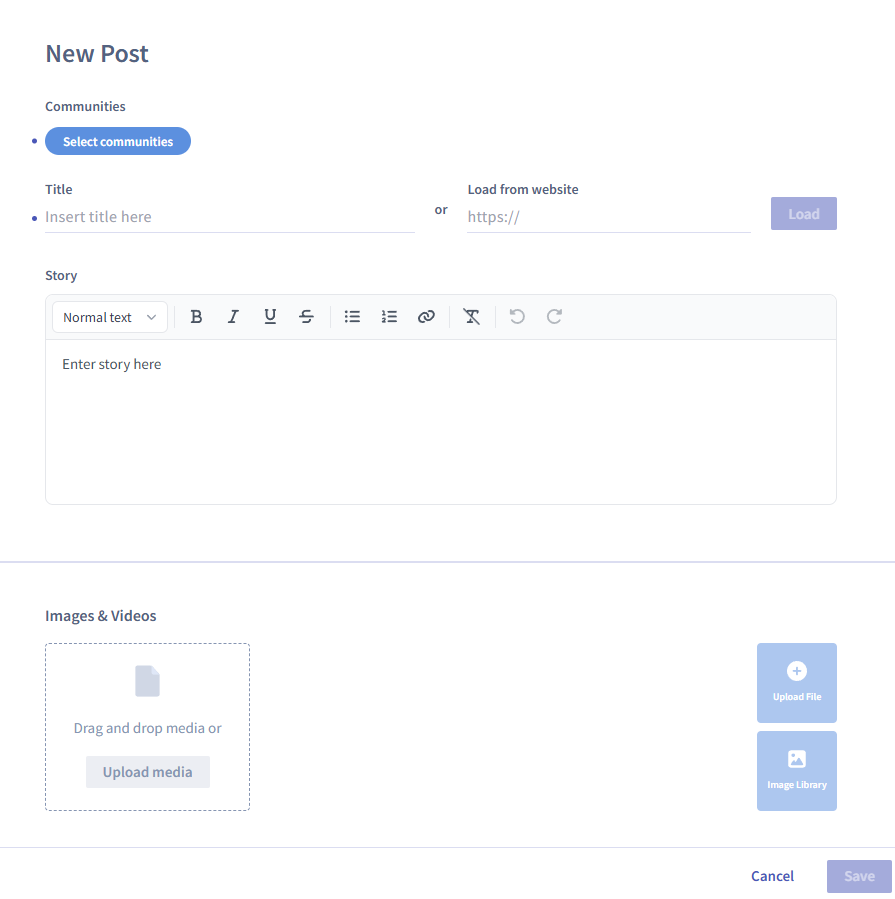
Click ‘New Post’ at the top left of screen.
Select the communities (either select all or individually).
Add the name of your news article in the ‘Title’ box.
Add the article story in the ‘Text’ box.
Alternatively, load the content from a website by including the URL and clicking the ‘Load’ button.
Upload an image or video by selecting the ‘Upload Media’ or ‘Upload File’ button. Alternatively, click on the ‘Image Library’ button to select an image from your app library.
Further news options are available including:
Audience > Select either all users or a custom audience.
Publish Options > Select if you would like a notification to be sent, if you would like it to publish to TV mode, and if you allow for comments to appear.
Schedule Post > Select if you would like to schedule this news article to appear at a later date.
Featured News > Select if you would like this to be a featured news article which will be highlighted on the home page.
Attachments > Select ‘Add Link’ or ‘Upload a File’ to include any relevant attachments and links to external websites.
Author Name > Include the author details if you would like this to appear.
Video > Enter the URL details of the video file such as YouTube and Vimeo links.
It’s now time to publish your news story, by clicking the ‘Save’ button at the bottom right of screen.
Create a shared library of draft news stories and events that can be accessed by your villages. This allows HQ users to prepare and distribute ready-to-use content that individual communities can review and publish when appropriate.
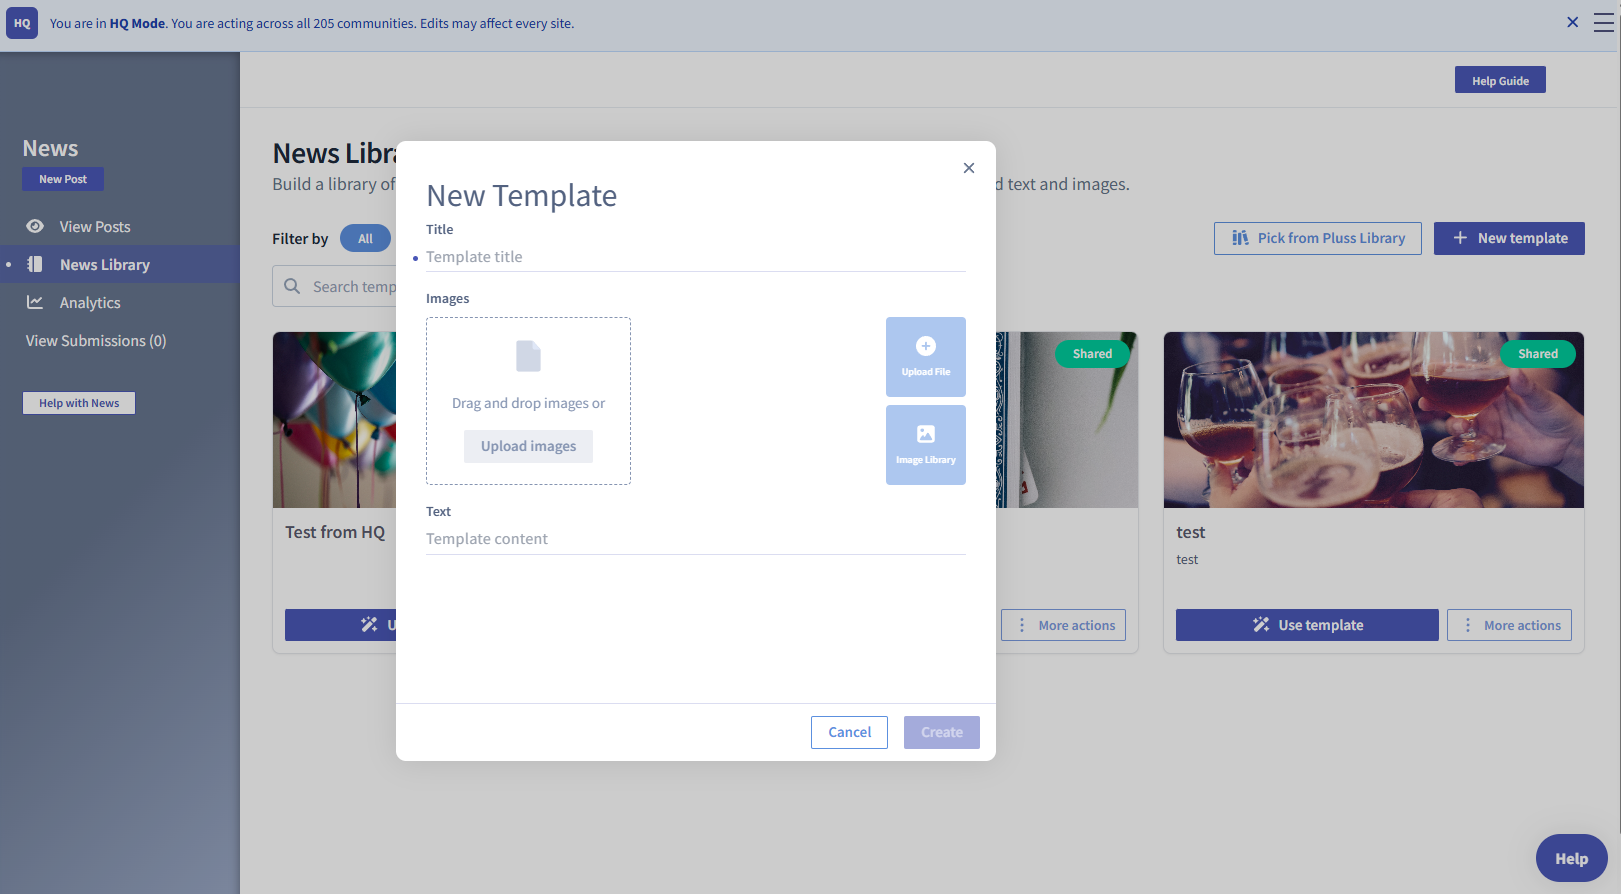
Creating a News Template.
To create a news template, from the HQ dashboard:
Click the ‘News’ feature by clicking the link in the left side menu.
Click ‘News Library’ from the left side menu.
Click ‘+ New Template’.
Add the following details:
Title
Image
Text
It’s now time to save your news template, by clicking the ‘Create’ button at the bottom right of screen.
Creating a draft library of news stories and events.
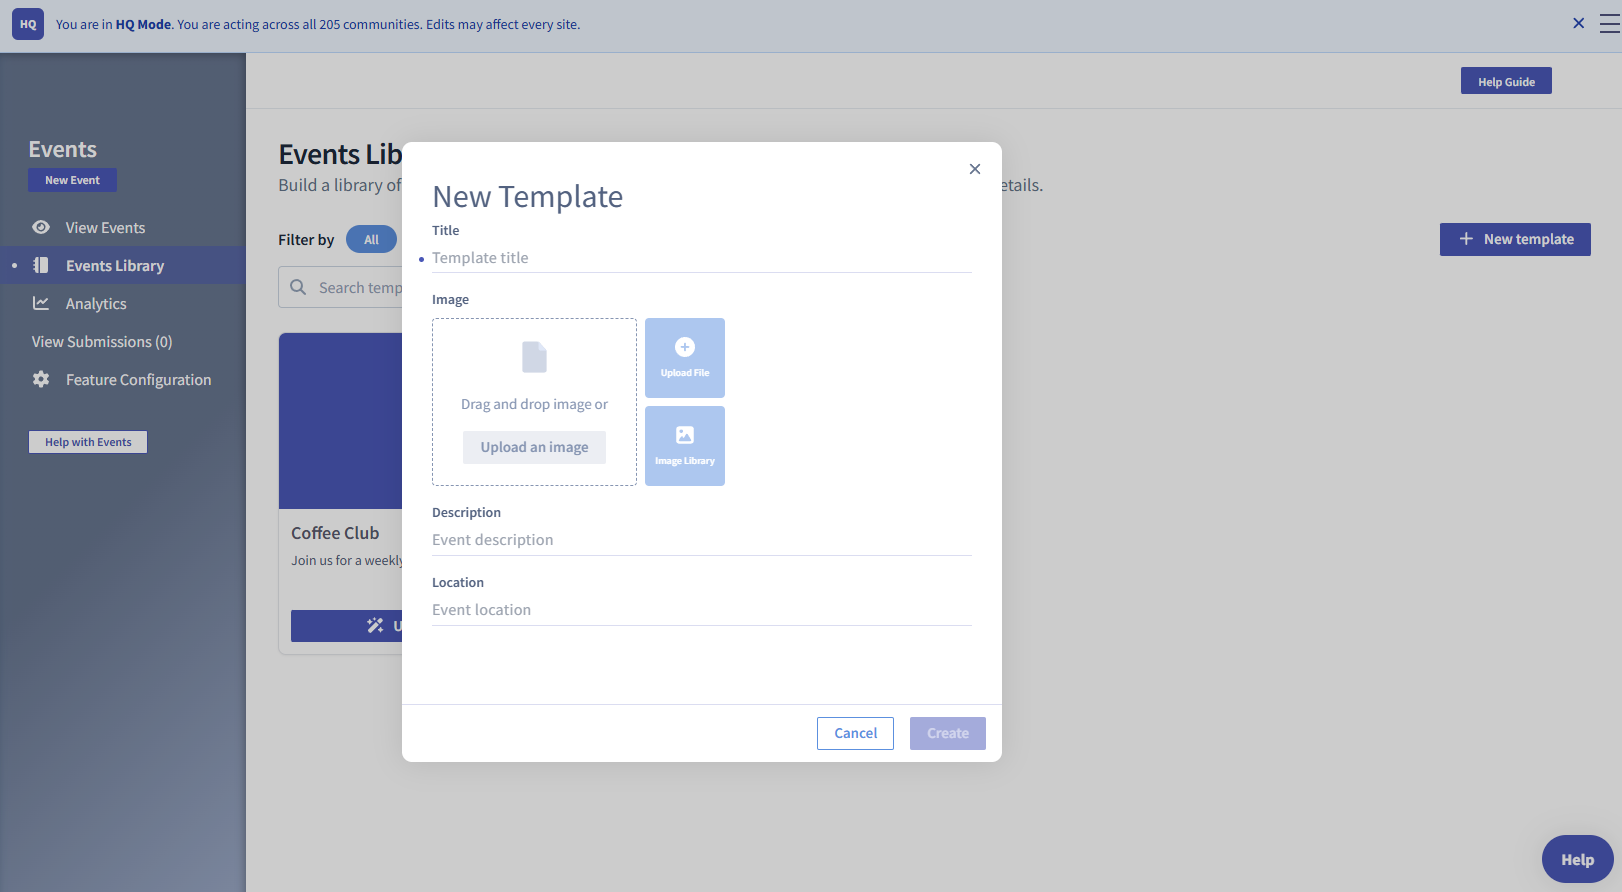
Creating an Event Template.
To create an event template, from the HQ dashboard:
Click the ‘Events’ feature by clicking the link in the left side menu.
Click ‘Events Library’ from the left side menu.
Click ‘+ New Template’.
Add the following details:
Title
Image
Description
Location
It’s now time to save your event template, by clicking the ‘Create’ button at the bottom right of screen.
Accessing the Pluss templates.
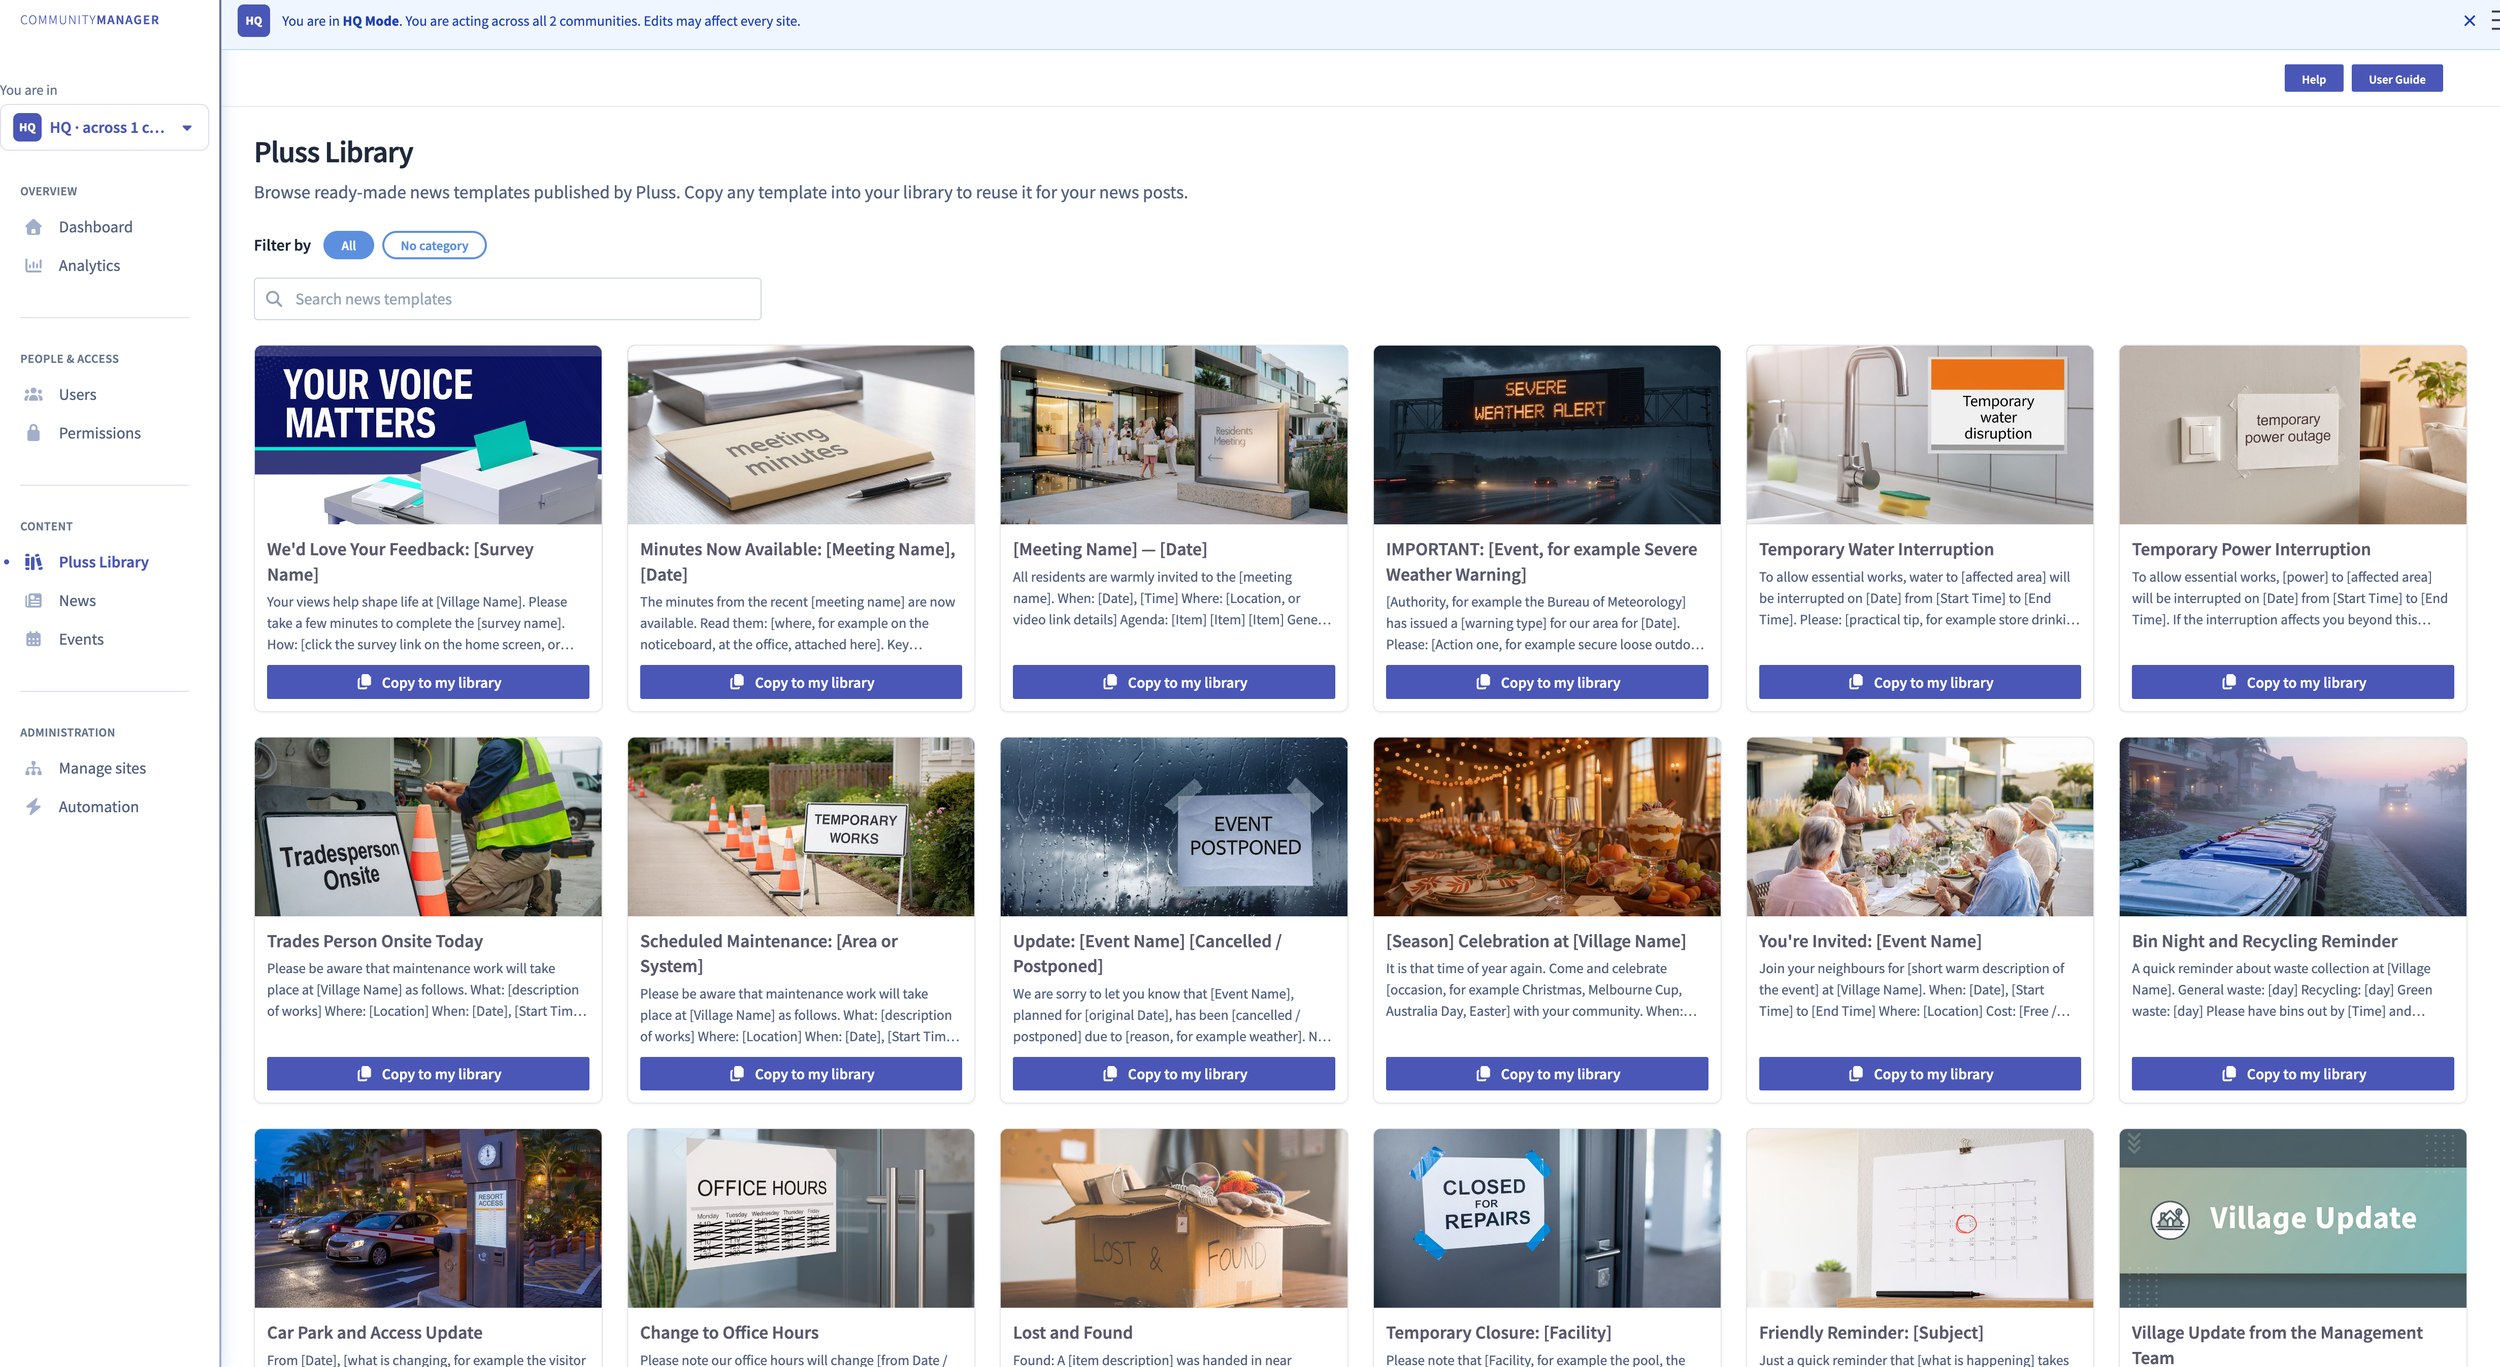
Access a library of professionally designed news templates to create engaging content faster. Simply customise a template to suit your community and publish when you're ready.
To access the Pluss templates, from the HQ dashboard:
Click ‘Pluss Library’ from the left side menu.
Find your desired template and select ‘Copy to my library’.
The template has now been saved in your library.
To use the News template:
Click ‘News’ from the left side menu.
Click ‘News Library’.
Find your desired template and select ‘Use template’.
Update the news story details.
It’s now time to publish your news story, by clicking the ‘Save’ button at the bottom right of screen.